Cloudflare DDoS Protection
When running an ARK node, especially a Delegate Node, you should consider your server’s security as your main priority.
Warning
During this guide, we will configure network and SSH parameters, which if improperly performed might permanently lock you out of your server. Ensure you fully understand each step before proceeding.
DDoS Protection With Cloudflare
In this section, we’re going to put your node’s public API behind Cloudflare with SSL for DDoS protection, using Nginx as a reverse proxy.
Information
Cloudflare only proxies HTTP(S) traffic, so this protects the public API (port 4003). The P2P port has to stay directly reachable for other nodes. Protect it with the connection limits instead.
Install Nginx
1sudo apt-get install -y nginxCloudflare / SSL Setup
Login to your Cloudflare dashboard and add a DNS record for your node, for example node.yoursite.com, pointing to your server’s IP. Make sure the record is Proxied (orange cloud).
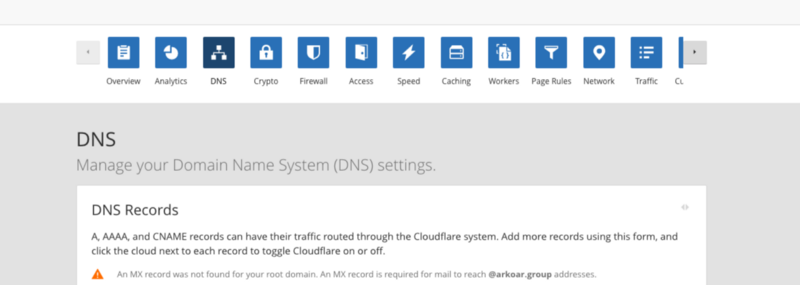
Then go to SSL/TLS and set the encryption mode to Full (strict), so the connection between Cloudflare and your server is encrypted and verified as well.

Go to SSL/TLS > Origin Server and click the Create Certificate button. Keep this window open after Cloudflare generates the certificate and private key.

Open a terminal on your ARK node server. We need to create a new folder and copy the certificate and key to our server:
1sudo mkdir -p /etc/nginx/ssl2sudo nano /etc/nginx/ssl/ark.crt3sudo nano /etc/nginx/ssl/ark.key4sudo chmod 600 /etc/nginx/ssl/ark.keyCopy the Origin Certificate to the file ark.crt and the Private Key to ark.key.
Edit Nginx Config
1sudo nano /etc/nginx/sites-available/ark-apiPaste in the following config, making sure you edit the server_name. You may need to change ssl_certificate and ssl_certificate_key if you name your files something different.
file: /etc/nginx/sites-available/ark-api
1# HTTPS 2server { 3 listen 443 ssl; 4 listen [::]:443 ssl; 5 server_name node.yoursite.com; 6 7 ssl_certificate /etc/nginx/ssl/ark.crt; 8 ssl_certificate_key /etc/nginx/ssl/ark.key; 9 ssl_protocols TLSv1.2 TLSv1.3;10 ssl_prefer_server_ciphers off;11 12 location / {13 proxy_pass http://127.0.0.1:4003/;14 proxy_http_version 1.1;15 proxy_set_header Host $host;16 proxy_set_header X-Real-IP $remote_addr;17 proxy_set_header X-Forwarded-For $proxy_add_x_forwarded_for;18 proxy_set_header X-Forwarded-Proto $scheme;19 proxy_redirect off;20 }21}Press CTRL+X to exit the file, Y to save the file, and ENTER to write to the file and return to the command line.
Information
TLS 1.0 and 1.1 are deprecated and rejected by modern browsers and by Cloudflare’s recommended settings, so only TLS 1.2 and 1.3 are enabled. Leaving ssl_ciphers unset uses the secure defaults of OpenSSL on Ubuntu.
Enable the Site and Start Nginx
1sudo ln -s /etc/nginx/sites-available/ark-api /etc/nginx/sites-enabled/ark-api2sudo nginx -t3sudo systemctl enable nginx4sudo systemctl reload nginxIf nginx -t reports an error, fix it before reloading. If everything started fine, you should be able to access your ARK node API at https://node.yoursite.com/api, behind SSL and with Cloudflare’s DDoS protection.
Only Allow Cloudflare
Your API is still reachable directly on port 4003, which bypasses Cloudflare. Close that port, and only allow HTTPS from Cloudflare’s IP ranges :
1sudo ufw delete allow 4003/tcp2for ip in $(curl -fsSL https://www.cloudflare.com/ips-v4) $(curl -fsSL https://www.cloudflare.com/ips-v6); do3 sudo ufw allow from "$ip" to any port 443 proto tcp4doneCloudflare occasionally changes these ranges, so check them now and then.
Conclusion
Your node is now very secure. With this setup, you can open your SSH port remotely using a secret knocking technique, sign in using cryptographic keys, and your public API is shielded by Cloudflare.